Contrary to the simple belief that faience is just “soft” pottery, its tendency to chip comes from a beautiful, inherent conflict within its structure. The porous earthenware body and the glassy tin-glaze expand and contract at different rates, creating a constant tension. This article reframes that fragility not as a defect, but as the very signature of faience, helping you appreciate the story written in every crack and chip.
As a ceramics restorer, I often see the frustration in a collector’s eyes when they bring me a beautiful but chipped piece of faience. “Why is it so delicate?” they ask, comparing it to the near-invincible nature of their porcelain items. The common answer you’ll find is that faience is a “low-fire” earthenware, making it softer and more porous. While true, this only tells a fraction of the story and misses the poetic, scientific reason for its characteristic fragility.
The truth is far more interesting. The tendency of faience to chip and crack isn’t a simple flaw; it’s a fundamental consequence of its design—a beautiful but unstable marriage between an earthy clay body and a coat of glass. Understanding this core principle, this built-in tension, is the key to moving from frustration to a deeper appreciation for these historical objects. It allows you to read the story of the piece in its imperfections.
This guide will walk you through the material science, artistic constraints, and conservation philosophies surrounding faience. We will explore why its glaze is prone to crazing, how its color palette was dictated by chemistry, and how you can care for these pieces not as flawed objects, but as honest survivors of time.
To navigate this exploration of faience’s unique character, here is a detailed look at the topics we will cover, from artistic styles to the science behind its preservation.
Contents: A Restorer’s Insights into Faience
- Rouen or Delft: Distinguishing Blue and White Styles
- The One-Shot Challenge: Why Faience Painters Can’t Make Mistakes
- Fill or Leave: When Does Repairing a Chip Lower the Value?
- Why You Never See Real Red in Early Faience
- Gravity Risks: Hanging Heavy Platters Without Metal Clips
- The Science of a Chip: How Glaze Chemistry Dictates Durability
- Handling and Storage: Protecting Fragile Faience Surfaces
- How to Spot a Transfer Print Disguised as Hand-Painting
Rouen or Delft: Distinguishing Blue and White Styles
For many collectors, the journey into faience begins with classic blue and white pieces. Yet, telling apart the two most famous styles, French Rouen and Dutch Delft, can be challenging. While both used a cobalt blue decoration on a white tin-glaze, their artistic sensibilities were distinct. Delftware often embraced chinoiserie motifs, featuring landscapes, figures, and floral patterns inspired by Chinese porcelain. The designs tend to be more pictorial and centralized, with a softer, more painterly touch.
In contrast, Rouen faience is synonymous with the ornate, symmetrical patterns of the Rococo and Baroque periods. Look for intricate lacework borders, scrolling foliage (lambrequins), and radiating designs that cover the entire surface of the piece. The feel is often more formal, decorative, and architectural. The illustration below highlights these stylistic differences, showing the painterly, scenic approach of Delft next to the dense, ornamental style of Rouen.
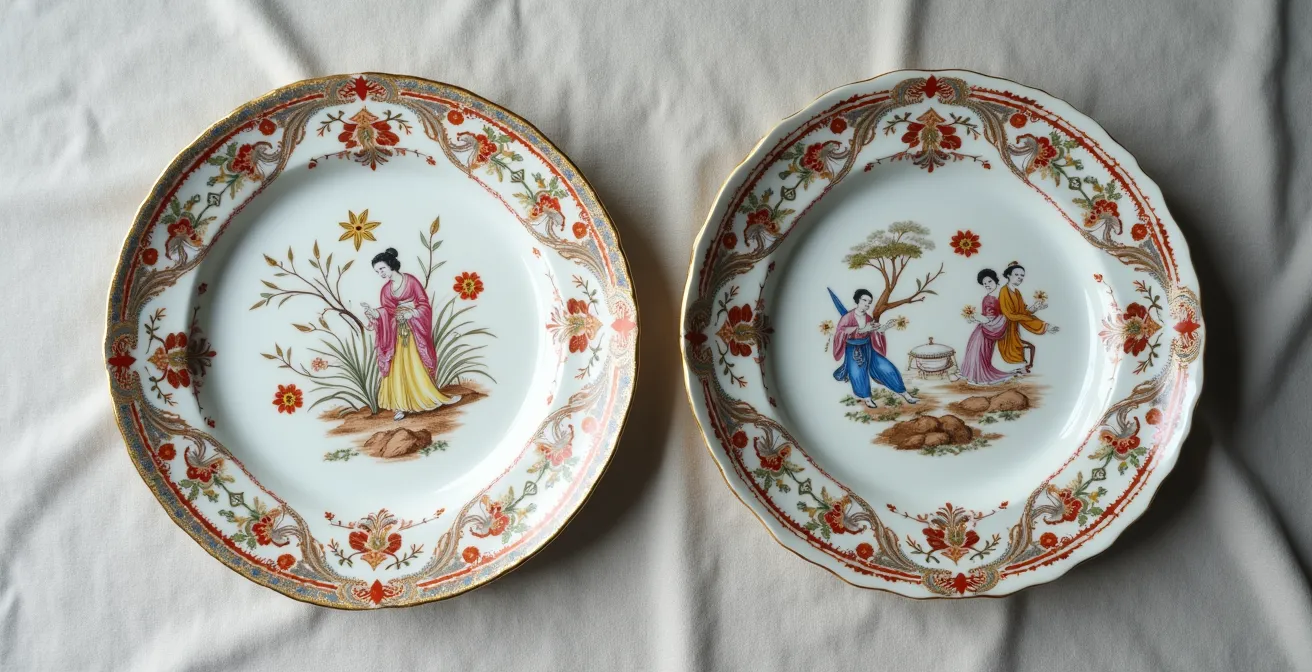
Observing these differences helps train your eye. Delft tells a story within its frame, while Rouen uses decoration to create a rich, textured object. The blue itself can sometimes be a clue; Delft blues can appear softer, while Rouen blues are often deep and vibrant. Understanding these nuances is the first step in appreciating the regional identities within the broader world of faience.
The One-Shot Challenge: Why Faience Painters Can’t Make Mistakes
The beauty of a hand-painted faience piece lies in its immediacy and the skill of the artist, who faced a unique and unforgiving challenge. Unlike oil painting or even decorating overglazed porcelain, faience decoration is applied onto the raw, unfired, and highly absorbent tin-glaze. This technique, known as in-glaze or grand feu decoration, means every brushstroke is a final commitment. The powdery, chalk-like surface instantly drinks the pigment, making corrections, blending, or erasing impossible.
This is the “one-shot” challenge. The artist had a single chance to get each line right. Any hesitation, slip of the hand, or misjudgment in pigment load would be permanently fired into the piece. This is why authentic, hand-painted faience possesses a vitality and spontaneity that cannot be replicated. The slight variations in line width from brush pressure and the subtle tremors in a curve are not flaws; they are the fingerprints of the human hand at work under immense pressure. This process is a testament to the confidence and mastery of the faience painter.
Your Checklist for Spotting Authentic Brushwork
- Variations in Density: Look for changes in pigment density within a single brushstroke, where the artist’s brush began to run out of color.
- Signs of Hesitation: Identify slight tremors or wobbles in long, curved lines, indicating the natural movement of a human hand.
- Uneven Line Widths: Check for lines that subtly thicken and thin as the artist adjusted the pressure on the brush.
- Wet-into-Wet Blending: Notice where different colors meet and bleed slightly into one another, a hallmark of being painted on the absorbent raw glaze.
- Brush Lifts: Spot tiny gaps or overlaps where the painter had to lift and reposition the brush in the middle of a long stroke.
Fill or Leave: When Does Repairing a Chip Lower the Value?
For a collector, a chip can feel like a devastating flaw. The immediate instinct is often to have it repaired, to restore the piece to its original “perfect” state. In Western conservation, the goal has traditionally been an invisible repair, where color-matched fillers and meticulous inpainting make the damage disappear. This approach aims to preserve the object’s aesthetic and monetary value by erasing the evidence of its traumatic history. For many market purposes, this remains a valid approach.
However, there is a growing appreciation for an alternative philosophy, one that doesn’t hide the damage but acknowledges it as part of the object’s life story. This is beautifully embodied by the Japanese art of Kintsugi (“golden joinery”), where broken pottery is repaired with lacquer dusted or mixed with powdered gold, silver, or platinum. As a philosophy, Kintsugi treats breakage and repair as important events in the life of an object, rather than something to be concealed. The repair itself becomes a celebrated part of its history.
Deciding whether to fill a chip or leave it depends on your perspective as a custodian of the piece. An invisible repair may maximize its resale value, but leaving a chip or choosing a visible repair like Kintsugi honors its journey and material honesty. The following table contrasts these two philosophies.
| Approach | Western Traditional | Japanese Kintsugi |
|---|---|---|
| Goal | Invisible repair | Celebrate the repair |
| Materials | Color-matched fillers | Gold or silver powder |
| Philosophy | Restore original appearance | Add to object’s history |
| Value Impact | Maintains monetary value | Can increase artistic value |
| Reversibility | Often reversible | Permanent with urushi |
Why You Never See Real Red in Early Faience
If you study a large collection of early European faience (from the 16th to mid-18th century), you’ll notice a distinct absence of bright, true red. You’ll find magnificent blues, vibrant greens, sunny yellows, and rich oranges, but a fiery crimson is almost always missing. This wasn’t a matter of artistic taste, but of pure chemistry and the limitations of the grand feu (“big fire”) technique. The pigments used for in-glaze decoration had to be robust enough to withstand the kiln’s intense heat.
The firing temperature for this process was formidable. As documented in ceramic arts research, this single firing reached around 1000°C (1832°F). At this temperature, the pigments had to fuse with the melting glaze and bond to the clay body. While oxides of cobalt (blue), copper (green), and antimony (yellow) were stable, the iron oxide used to produce red was notoriously volatile. It would often burn out, turning a dull, muddy brown or black. The only way to achieve a reddish hue was with an iron-manganese mix that produced a color closer to ochre or brick than a true red.
The solution was the development of the petit feu (“little fire”) technique in the mid-18th century. This revolutionary process involved a second, lower-temperature firing. After the initial grand feu firing created the white glazed base, more delicate enamel colors, including a brilliant red derived from iron oxide, could be painted on top. The piece was then fired again at a much lower temperature (around 600-800°C), which was gentle enough to preserve the fragile red. This innovation dramatically expanded the faience painter’s palette, but it also marks a clear dividing line in the history of its production.
Gravity Risks: Hanging Heavy Platters Without Metal Clips
One of the most common forms of damage I see comes not from use, but from improper display. A large, heavy faience platter is a magnificent sight on a wall, but it is also a disaster waiting to happen if hung incorrectly. The single greatest enemy of a heavy ceramic piece is a point of focused stress. Those ubiquitous, spring-loaded wire plate hangers are particularly dangerous for faience. Their metal tips concentrate the entire weight of the platter onto four small points on its fragile, glazed edge, creating immense pressure. Over time, gravity will win, and these pressure points can easily cause the edge to chip, crack, or fail entirely.
As a restorer, I plead with collectors to abandon these clips for heavy or valuable pieces. The earthenware body of faience is simply too soft and the glaze too brittle to withstand that kind of focused, long-term stress. Museum conservators use methods that prioritize even weight distribution and cushion every point of contact. This approach protects the object from the slow, relentless pull of gravity.
For safe display, consider these museum-approved alternatives that cradle the object rather than pinching it:
- Custom-fit spider mounts: These metal brackets are custom-made to grip the back of the platter, distributing weight across a wide area.
- Protective tubing: Any part of a metal mount that touches the faience should be covered with soft, inert vinyl or silicone tubing.
- Felt-lined stands: For shelf or mantelpiece display, angled stands lined with thick felt provide secure, cushioned support.
- Floating shelves with a lip: A simple shelf with a raised front edge is one of the safest ways to display plates vertically without applying any pressure to the object itself.
- Acrylic easels: For smaller, lighter pieces, clear acrylic easels offer good support with minimal visual intrusion.
The Science of a Chip: How Glaze Chemistry Dictates Durability
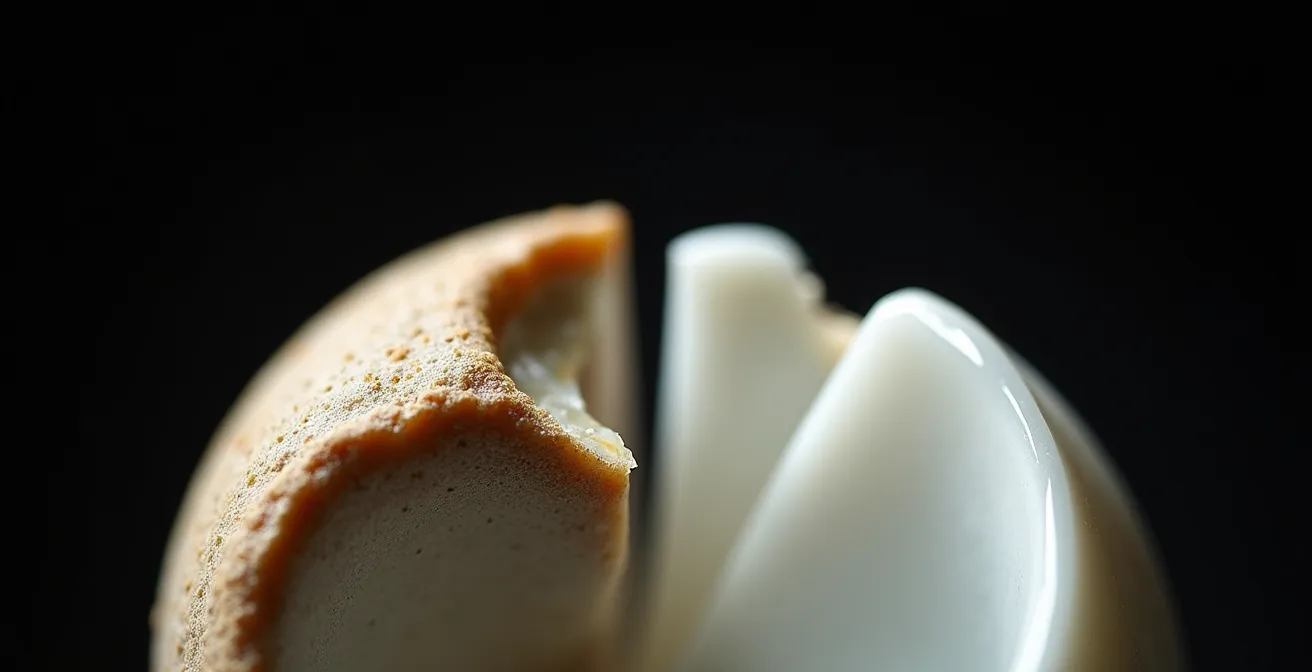
We now arrive at the heart of the matter: the fundamental reason why faience is so prone to chipping. It’s not just about being “soft.” The issue is a phenomenon known as glaze-body tension. Imagine two materials fused together that want to shrink at different rates as they cool. This is exactly what happens with faience. The porous, earthenware clay body and the glassy tin-glaze have different coefficients of thermal expansion. After being fired to temperatures that, according to recent mineralogical analysis, could reach a maximum of 1050°C for glaze vitrification, the piece begins to cool. The glaze typically shrinks more than the clay body beneath it.
This mismatch puts the glaze layer under immense compression, like a tightly stretched skin. While this can initially make the surface seem strong, it also makes it incredibly brittle and ready to release that tension at the slightest impact. A small knock on the edge of a plate provides a release point for all that stored energy, causing the inflexible glaze to flake off, often taking a small piece of the softer clay body with it. This is the anatomy of a classic faience chip. In contrast, porcelain is fired at a much higher temperature, causing the body and glaze to vitrify and fuse into a single, homogenous, and far more stable material.
This inherent tension is also responsible for “crazing”—the network of fine cracks you often see in the glaze of older faience. These are not typically signs of damage, but rather the glaze slowly releasing its tension over decades. As an expert from Caldeirao da Cati noted in a comparative study:
Faience more often shows cracks in the enamel surface due to aging, while porcelain is less affected over time.
– Caldeirao da Cati, Comparative study of faience and porcelain aging
So, when you see crazing or a chip, you are witnessing the physical evidence of faience’s unique and beautiful, if unstable, creation.
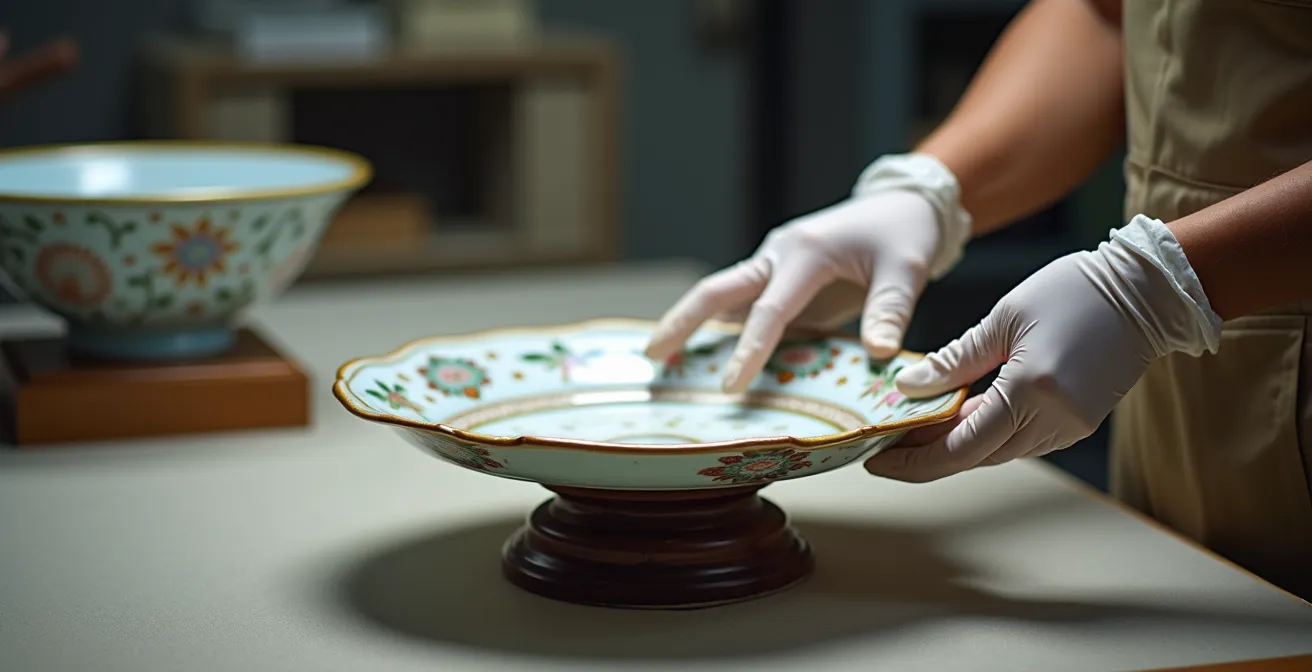
Handling and Storage: Protecting Fragile Faience Surfaces
Understanding that the glaze on faience is a thin layer of glass under tension should change the way you handle and store your collection. Protection is about minimizing two things: impact and surface abrasion. The glaze, while hard, is also brittle, and the earthenware body beneath it is soft. This combination means that even small scratches or bumps can lead to significant damage over time. Proper care requires a gentle touch and the right materials.
When cleaning, never use abrasive powders or harsh scrubbing pads. A soft cloth with a mild, pH-neutral soap and water is all that is needed. Generic feather dusters should be avoided, as they can drag microscopic grit across the surface, causing fine scratches. A high-quality microfiber cloth is a much safer choice for dusting. When moving or handling pieces, always use two hands and support the object from its base, not by a handle or rim, which are points of weakness.
Storage is equally critical. Stacking plates or bowls directly on top of one another is one of the quickest ways to cause damage. The unglazed, rough foot-ring of one piece will inevitably scratch the delicate glazed surface of the one below it. To prevent this, always use a protective layer between items. Here are some essential materials for safe storage:
- Museum-grade felt rounds: Place these thick, soft pads between any stacked plates or bowls.
- Silicone dots: Small, self-adhesive silicone bumpers can be applied to the unglazed foot-ring to cushion it and prevent scratching.
- Acid-free tissue paper: For wrapping or layering lighter items, ensure the paper is archival quality to avoid chemical reactions over time.
- Felt pads for shelves: Line your display or storage shelves with felt to provide a soft, non-slip surface for your pieces to rest on.
By adopting these simple habits, you act as a true custodian for your collection, safeguarding its fragile surfaces for future generations to appreciate.
Key Takeaways
- The primary cause of chipping in faience is the glaze-body tension due to different cooling rates, not just its “softness.”
- Authentic hand-painting can be identified by its “one-shot” characteristics, like variations in line width and pigment density, which prove it was done on a raw, absorbent glaze.
- Deciding to repair a chip involves a philosophical choice between Western invisible restoration and Eastern Kintsugi, which celebrates the object’s history.
How to Spot a Transfer Print Disguised as Hand-Painting
As faience became more popular in the late 18th and 19th centuries, manufacturers sought faster, cheaper ways to produce decorated wares. This led to the rise of transfer printing, a technique where a design is engraved on a copper plate, inked, and transferred via paper onto the ceramic body. While an art form in its own right, transferware is often mistaken for or even deceptively sold as more valuable hand-painted faience. For a collector, knowing how to spot the difference is a crucial skill.
The key is to look for signs of mechanical repetition instead of the subtle imperfections of the human hand. A transfer-printed design will have a uniformity that is impossible to achieve by hand. The lines will have a consistent thickness and the pigment density will be even throughout. If the pattern repeats, such as on a set of plates, each repetition will be identical. Under magnification, you may even see a fine dot matrix, a tell-tale sign of a printed image rather than a fluid brushstroke.
Another giveaway is to look for seams. On curved surfaces, the transfer paper may have been cut and overlapped, leaving a faint line or a slight misalignment in the pattern that would never occur in hand-painting. In contrast, as we’ve discussed, hand-painted work shows variable line widths, differing pigment loads, and unique variations in every single piece. The following table provides a clear guide to distinguishing these two techniques.
| Feature | Hand-Painted | Transfer-Printed |
|---|---|---|
| Line variation | Natural width changes | Uniform thickness |
| Pattern repeat | Unique each time | Identical repetition |
| Pigment density | Variable within strokes | Even distribution |
| Under magnification | Continuous brushstrokes | Dot matrix visible |
| Seams/overlaps | None | Faint transfer edges |
Ultimately, appreciating faience is about embracing its material honesty. The cracks, the crazing, and the chips are not signs of failure but a visible record of its history and its very nature. By understanding the science behind its fragility, you shift from being a frustrated owner to an informed custodian, one who can cherish the perfect imperfections of each piece. To fully protect your collection, applying these principles of care and understanding is the most valuable step you can take.