
The true test of gold leaf is not its color, but the story told by its application method and the noble patina of age.
- Genuine water-gilded surfaces reveal a colored clay (bole) layer when worn and can achieve a mirror-like burnish, impossible with imitations.
- Authentic gold leaf (23kt or higher) will not tarnish, whereas imitation leaves made of brass or copper will darken and corrode over time.
Recommendation: Prioritize identifying the underlying gilding technique (water or oil) and assessing the object’s historical integrity before considering any cleaning or restoration.
For the antique buyer or restorer, the glint of gold on a frame, a piece of furniture, or a work of art presents a critical question: is it genuine? A common approach relies on a simple visual assessment of color and brightness. Many believe they can spot the “brassy” look of an imitation or the tell-tale signs of tarnish. While not entirely wrong, this surface-level analysis barely scratches the gesso. It overlooks the fundamental truths of the gilder’s craft and the very properties that give gold its enduring value.
The distinction between real gold and its cheaper counterparts—often brass (composition leaf) or copper—is not merely a matter of material. It is a story told in layers, technique, and time. To truly identify genuine gold leaf, one must look beyond the shine and learn to read the object like a master gilder does. This involves understanding the two core methods of application—water gilding and oil gilding—as each leaves behind a distinct fingerprint that a trained eye can detect. The secret lies not in asking “Is it bright enough?” but in asking “How was this surface built?”.
This guide moves beyond simplistic tests. We will delve into the material science and historical context that define authenticity. By understanding the techniques, the behavior of different gold karats, and the ethics of conservation, you will gain the confidence to assess a gilded object not just for its material, but for its history, its craftsmanship, and its true, irreplaceable value. This is the path from amateur speculation to professional certainty.
To navigate the complexities of this ancient craft, this article is structured to build your expertise step-by-step. The following summary outlines the key areas we will explore, from foundational techniques to the critical decisions faced by every conservator.
Summary: A Gilder’s Guide: Distinguishing Real Gold Leaf from Imitations
- Water or Oil Gilding: Which Technique Suits Your Restoration Project?
- The Agate Burnisher: Achieving Mirror Shine Without Tearing the Gold
- Why Gold Backgrounds Represented Eternity, Not Just Wealth
- To Re-Gild or Consolidate: When New Gold Ruins the Patina
- 24 Karat or Alloy: How Purity Affects Long-Term Tarnish
- Arsenic and Lead: The Deadly Cost of Bright Colors
- Beautiful but Deadly: The Health Cost of 18th Century Gilding
- Ammonia or Soap: How to Brighten Bronze Without Ruining It
Water or Oil Gilding: Which Technique Suits Your Restoration Project?
The first and most critical step in identifying genuine gold leaf is determining the original application method. All gilding falls into two families: water gilding and oil gilding. They are fundamentally different in their structure, appearance, and durability. A restorer’s choice is not about preference but about respecting the object’s original construction. Water gilding is the traditional, more complex method reserved for interior objects like picture frames and furniture. It involves applying the leaf over a base of gesso (a mixture of chalk and animal glue) and a colored clay layer called bole. This structure allows the gold to be burnished to a brilliant, mirror-like shine.
Oil gilding, in contrast, uses an oil-based adhesive (or “size”) applied over a sealed surface. It is simpler, more robust, and suitable for both interior and exterior work, such as architectural details or signage. However, an oil-gilded surface can never be burnished; its sheen is a consistent, gentle luster derived from the leaf itself. The difference in vulnerability is stark; as conservation experts at Bernacki & Associates report, water-gilded surfaces are extremely sensitive to moisture, whereas oil-gilded surfaces are water-resistant. This distinction is your primary clue in identifying the nature and quality of a gilded object.
This microscopic view reveals the foundational differences between the two techniques. Understanding these layers is key to proper identification and conservation. The image below provides a clear visual distinction between the complex strata of water gilding and the simpler structure of oil gilding.

As you can see, the water-gilded sample on the left shows distinct layers of gesso and bole beneath the gold, which are absent in the oil-gilded sample on the right. Recognizing these structural signatures is the first step toward an accurate assessment. The following checklist provides a systematic approach to diagnosing the original method used on an antique.
Your diagnostic checklist: Identifying the original gilding method
- Examine the surface sheen: Check for a mirror-like brilliance with dynamic light response (water gilding) versus a consistent matte to semi-gloss appearance (oil gilding).
- Check for visible bole layers: Look for traces of red, yellow, or grey clay showing through worn areas, a definitive sign of water gilding.
- Assess environmental vulnerability: Note any patterns of cracking or delamination caused by humidity, which indicates a water-gilded object.
- Document cracking patterns: Water gilding often exhibits fine, brittle fractures through the gesso and bole layers, while oil gilding wear appears more like surface abrasion.
- Apply the reversibility principle: Remember that any new intervention should be reversible; water gilding allows for easier removal and repair than modern oil-based methods.
The Agate Burnisher: Achieving Mirror Shine Without Tearing the Gold
The brilliant, liquid-metal shine associated with the most exquisite antique frames is not an inherent property of gold leaf itself, but the result of a delicate and skilled process: burnishing. This technique is exclusive to water gilding. After the gold leaf is laid on the slightly moist bole, and once it has dried to the perfect state, the gilder uses a specialized tool—typically a polished agate stone set in a handle—to rub the surface with firm, controlled pressure. This action does more than polish the gold; it compresses the microscopic particles of the clay bole beneath, transforming the slightly matte surface into a compact, reflective, glass-like finish.
The process is fraught with risk. Too little pressure and the shine remains dull; too much, and the impossibly thin leaf tears, exposing the bole beneath. The choice of burnisher is critical, with different shapes designed for specific tasks, from broad flat areas to intricate carvings. The ability to achieve a flawless burnish is a hallmark of a master gilder and a definitive proof of the water gilding method. An imitation leaf laid with a modern synthetic adhesive cannot be burnished; any attempt to do so would simply scratch and tear the surface without producing a shine.
To select the right tool for restoration, a gilder must understand how shape and pressure correspond to the desired effect. The following table compares common burnisher types and their applications, essential knowledge for any restorer’s toolkit.
| Tool Type | Best Application | Key Feature | Pressure Required |
|---|---|---|---|
| Pointed Burnishers | Fine details & lettering | Precision tip for intricate work | Light pressure |
| Curved Burnishers | Picture frames & sculptures | Follows contoured surfaces | Moderate pressure |
| Chisel-Shaped | Broad flat areas | Even pressure distribution | Moderate to firm |
| Ball-Tip Burnishers | General polishing | Universal smoothing capability | Light to moderate |
| Hematite Burnishers | Alternative luster effects | Different stone hardness creates unique finish | Moderate pressure |
Why Gold Backgrounds Represented Eternity, Not Just Wealth
The use of gold in art, particularly in the luminous backgrounds of medieval icons and religious paintings, was not merely a display of wealth. It was a profound theological statement. Gold, as a material, does not corrode or tarnish. It is incorruptible. This physical permanence made it the perfect symbol for the divine, the eternal, and the unearthly light of heaven. When an artist chose a gold background, they were not just decorating a panel; they were attempting to represent a reality beyond the transient, decaying world. The light reflected from a gilded surface is unlike any pigment; it is active, changing with the viewer’s position and the ambient light, suggesting a living, divine presence.
This symbolic power is directly tied to the material’s purity. As master gilder Bart Bjornberg explains, the effect of gold is elemental and deeply human:
Gold leaf has been a revered surface decoration for thousands of years. Its color, reflectivity and permanence have been associated with beauty and richness in cultures and classes across the globe. There is something in the reflected light from this elemental material that triggers joy, awe, and fascination in the human consciousness as accessed through the eye.
– Bart Bjornberg, Conservation & Design International
This is where imitation leaf fundamentally fails, both aesthetically and chemically. Leaves made from brass or other alloys will inevitably darken and corrode over time as their constituent metals react with the atmosphere. Even when coated with a protective varnish, this process is only delayed, not stopped. An essential quality of genuine gold is its steadfastness; according to historical restoration analysis, genuine gold leaf maintains its shimmer indefinitely, while imitation gold will always degrade. Therefore, a gilded surface that has held its luster for a century or more is almost certainly real gold.
To Re-Gild or Consolidate: When New Gold Ruins the Patina
For a restorer, identifying real gold is only the beginning. The next, more difficult question is what to do with a damaged surface. A common impulse is to “fix” areas of loss by re-gilding them, aiming for a uniform, like-new appearance. This is often the greatest mistake one can make. The value of an antique gilded object, both historically and monetarily, is intrinsically linked to its original surface and patina. The subtle wear, the gentle toning of the gold over centuries, and the areas where the leaf has worn away to reveal the colored bole beneath are not flaws; they are the object’s history, a testament to its age and authenticity.
Aggressive re-gilding destroys this history. As conservator Kevin Howell powerfully states, an object’s value is conditional on its originality. In a case study on conservation ethics, he emphasizes that once the original surface is lost, the artifact itself may become “all but worthless.” The ethical approach is one of minimal intervention. Instead of wholesale re-gilding, a conservator should focus on consolidation: securing loose flakes of original gesso and gold. If replacement is absolutely necessary for small areas, it must be done with meticulous care, toning the new leaf to match the aged appearance of the original. Some conservators even use a slightly different tone of gold to ensure the repair is identifiable to future experts, a practice known as “in-gilding.”
The beauty of a well-preserved antique lies in this “noble wear.” The image below shows a historic frame where the passage of time has created a valued aesthetic, with the worn gold revealing the deep red bole, a quality cherished by collectors.
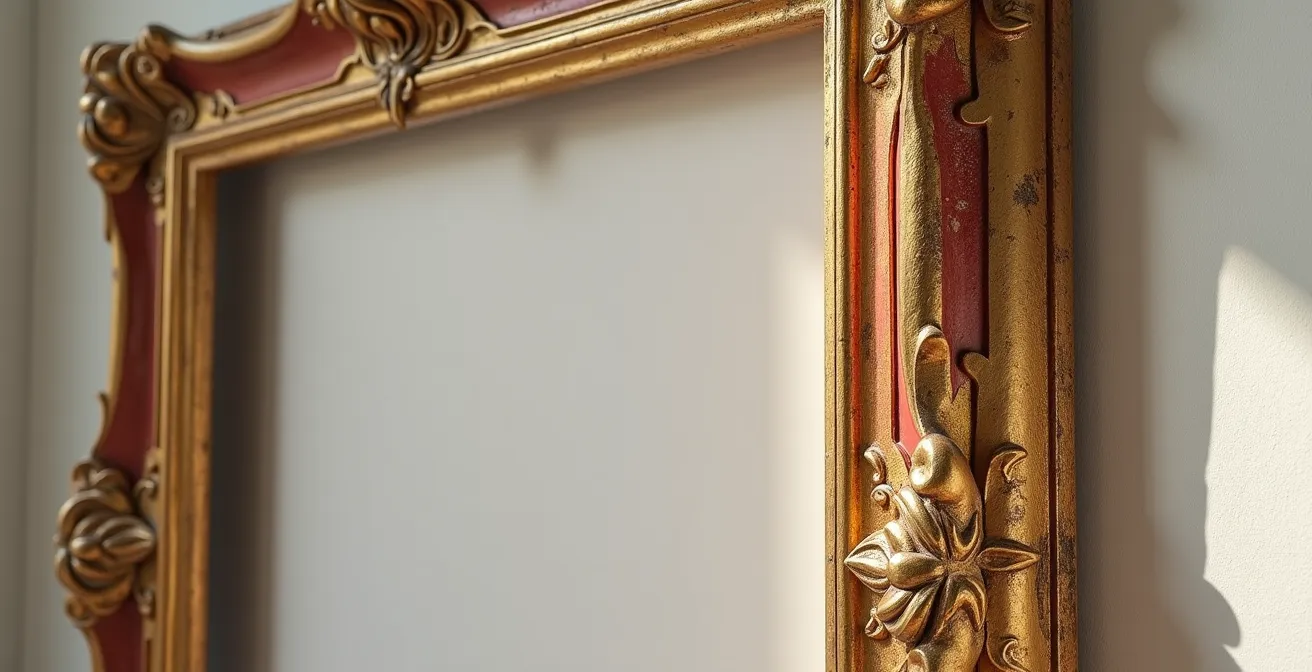
This aesthetic is the very thing that aggressive restoration destroys. Preserving the patina requires a deep respect for the object’s journey through time. Before picking up a brush, a restorer must weigh the desire for perfection against the duty to preserve history. The goal is not to make it look new, but to ensure it can continue to age gracefully.
24 Karat or Alloy: How Purity Affects Long-Term Tarnish
Not all gold leaf is created equal. The term “real gold” encompasses a range of purities, measured in karats, and this purity has a direct impact on the leaf’s color, handling properties, and most importantly, its long-term stability. Pure 24kt gold is 100% gold, offering the classic rich yellow color and a guarantee of never tarnishing. However, it is also incredibly soft and can be difficult to handle. For this reason, gilders often use alloys—gold mixed with small amounts of other metals like silver, copper, or palladium—to achieve different colors and improve durability.
For example, adding silver creates a paler “lemon gold,” while copper produces a warmer “rose gold.” These alloys are still considered genuine gold leaf, but their lower purity makes them susceptible to tarnishing over time, especially in karats below 22. This is a crucial diagnostic point: if a gilded surface shows slight, uniform toning but no corrosion, it might be a lower-karat gold alloy, not an imitation. In contrast, brass or copper imitation leaf will show dramatic and often uneven darkening and greenish corrosion.
The intended use of the object also dictates the necessary purity. For exterior architectural work, only the highest purities will suffice. According to technical specifications from Gilded Planet, only 23kt to 23.75kt gold leaf can be expected to maintain its integrity outdoors for 30 years or more. Anything less is strictly for indoor use and may require a protective sealant, which itself can yellow and fail over time. The following table breaks down common gold leaf alloys and their characteristics, providing a guide for matching material to purpose.
| Alloy Type | Composition | Color Tone | Best Application | Tarnish Resistance |
|---|---|---|---|---|
| 24kt Fine Gold | 100% gold | Classic yellow | Museum pieces, sacred art | Never tarnishes |
| 23kt Gold | 96% gold + silver/copper | Rich yellow | Exterior architectural | 30+ years outdoor |
| Moon Gold | Gold/palladium alloy | Cool, muted tone | Contemporary design | Excellent |
| 18kt Gold | 75% gold + silver | Pale yellow | Indoor decorative only | Requires sealing |
| Champagne Gold | Gold/copper blend | Pink-toned warmth | Luxury interiors | Good with coating |
Arsenic and Lead: The Deadly Cost of Bright Colors
When handling and restoring historical objects, a conservator’s attention must extend beyond the gold itself to the other materials present, many of which carry a hidden and dangerous legacy. Throughout art history, some of the most vibrant and desirable pigments were derived from highly toxic heavy metals. Colors like “Orpiment” (a brilliant yellow) were made from arsenic sulfide, while “Naples Yellow” and “Lead White” were lead-based compounds. These pigments were often used in polychromy alongside gilding to create lavish decorative schemes.
While their use has been discontinued for safety reasons, these toxic materials persist on antique objects. Any restoration work that involves sanding, scraping, or cleaning these surfaces can release hazardous dust into the air. Inhaling or ingesting these particles can lead to severe and cumulative health problems. Therefore, a modern restorer must act with the caution of a forensic scientist, assuming any historic colored surface may be toxic until proven otherwise. This requires a strict safety protocol, including proper ventilation, the use of respirators and gloves, and careful disposal of all waste materials.
The preparation of the surface before any new work is applied is a moment of high risk, but also of critical importance for the quality of the final result. As the John Canning & Co. conservation team notes, cleanliness is paramount for both safety and adhesion:
Assuring the substrate is carefully cleaned and prepared is critical to guaranteeing the longevity of the gilded application. Additionally, the environment must also be dust-free at the time of gilding in order to minimize any dirt particles adhering to the size.
– John Canning & Co. Conservation Team, Professional Gilding Safety Guidelines
This dual need for cleanliness—to protect the gilder’s health and to ensure a flawless finish—highlights the professionalism required in modern conservation. Before touching an antique, one must always consider the unseen dangers that may lie dormant within its beautiful colors.
Beautiful but Deadly: The Health Cost of 18th Century Gilding
While toxic pigments posed a significant risk, the most infamous hazard in the history of gilding was a specific technique known as mercury-amalgam gilding, or “ormolu.” Popular in the 18th century, particularly for decorating bronze, this method involved mixing gold with mercury to form a paste. This amalgam was applied to the object, which was then heated. The intense heat caused the mercury to vaporize, leaving a thin, well-bonded layer of gold behind. The resulting finish was spectacular, but the cost was horrific. The gilders, working in poorly ventilated workshops, inhaled the toxic mercury fumes, leading to severe neurological damage, madness, and a tragically early death.
The practice was so notoriously dangerous that it was eventually banned in most of Europe. The progression from these deadly historical methods to safer modern techniques is a testament to the evolution of the craft. Today, gilders can achieve stunning results without risking their lives. As Britain & Co Ltd specialists note, modern oil sizes made from safe, natural materials like boiled linseed oil have completely replaced the toxic mercury-based methods of the past. The art of gilding has survived by adapting, prioritizing the health of the artisan while preserving ancient aesthetic principles.
This historical perspective is vital for any restorer. When you encounter an 18th-century ormolu object, you are looking at an artifact produced at a terrible human cost. It underscores the responsibility to handle such pieces with respect and to use only modern, safe materials in their conservation. It also serves as a stark reminder of why certain historical techniques should remain in the past, studied for their results but never replicated in their method. The beauty of these objects is forever intertwined with this dark history.
Key Takeaways
- True identification of gold leaf depends on recognizing the underlying gilding technique (water vs. oil) and its unique signs of wear.
- The value of an antique is in its original surface; the patina of age is a feature to be preserved, not a flaw to be “corrected” with aggressive re-gilding.
- Gold’s purity (karat) is the primary determinant of its color and its resistance to tarnish, with only 23kt or higher being suitable for long-term exterior use.
Ammonia or Soap: How to Brighten Bronze Without Ruining It
After carefully identifying the nature of a gilded surface, the final challenge is often cleaning. Years of accumulated dust, grime, or nicotine can obscure the gold’s luster. The temptation to use commercial metal polishes or household cleaners is immense, but doing so is one of the fastest ways to permanently ruin an antique. These products are often abrasive or contain harsh chemicals like ammonia, which can strip away not only the delicate gold leaf but also the valuable patina and any original toning or glazing. As conservator Kevin Howell warns, these original layers are just as important as the gold itself; once lost, the object’s historical and monetary value can be decimated.
The correct approach to cleaning is always progressive and minimally invasive. One must start with the gentlest method possible and only escalate if necessary, testing each step on a small, inconspicuous area first. The first step is always dry cleaning with a soft brush to remove loose dust. If more is needed, a swab lightly dampened with distilled water may be sufficient. Only after these methods fail should one consider using a pH-neutral conservation-grade surfactant. Using any solvent or chemical without understanding its effect on the specific materials of the object—the gold alloy, the gesso, the bole, the underlying substrate—is a reckless gamble.
The goal is never to make the object look brand new. It is to gently lift the obscuring dirt to reveal the original surface in its authentic, aged state. The patience this requires cannot be overstated. Rushing the process or jumping to a strong chemical solution will invariably cause irreversible damage. True conservation is an act of careful stewardship, not aggressive renewal.
The aim should be to retain the original surface, including any glazing and toning as these are just as important to the original work as the underlying metal leaf. Once these are lost, the artefact itself may be all but worthless in both historic and monetary terms.
– Kevin Howell, The Building Conservation Directory
Ultimately, the ability to distinguish and care for genuine gold leaf is a skill built on knowledge, observation, and respect. By moving beyond surface appearances and learning to read the language of the materials and techniques, you elevate your practice from simple repair to true conservation, ensuring these beautiful objects can continue to tell their story for generations to come.